For several years now my sister Lisa; her kids, Kaylee and Chase; her friend, Perry; and I have joined my Mom and Dad at their house to make Lefse before the holidays. My daughter, Nikole, makes lefse across the state but I don't think that we have ever made it together. This year we decided to try a baking day that included more of our Norwegian goodies and invited all of our family members. In addition to getting some of the baking done it was also my intention to give the next generation of our family an opportunity to experience how some of our traditional goodies are made.
When we first started making lefse we did not have Grandma's recipe and we used a recipe from Caroline, a friend of my parents. It was a recipe that used boxed mashed potatoes and it worked well. The potatoes were cooked and mashed and then chilled overnight. They were rolled and cooked the next day. Last year, or maybe the year before, another friend of my parents, Ruth, shared her recipe for lefse. It is made using warm potatoes, cooked a few at a time in multiple batches. While warm, the potatoes are mashed and the remaining ingredients are added and hen the still warm potato dough is rolled and cooked. We like this recipe as well but it does not lend itself to a large group lefse day. It is the best recipe for spur of the moment lefse making as it does not require any chilling. For our lefse day we used a recipe that is favored by my daughter Nikole. She also prepares her dough the day before and chills it overnight. We like this recipe too. It was a nice dough to work with and produced a tasty lefse. Dad said that today the conversation at the truck stop that he frequents was about lefse and it seems that other lefse makers are using the warm dough recipe and method.
Lefse requires a substantial investment in equipment. The lefse grill is a round electric griddle. When we make lefse we use my parents grill and my sister's grill at the same time. It takes longer to grill a lefse than to roll a lefse so one person rolling can keep up with more than one grill. We started out with one grill and that worked great. Adding a second grill allows us to get our lefse done in a shorter amount of time. Nikole also owns two grills.
Rolling lefse is done on a cloth covered board. We all own round boards with fitted cloth covers. They work for more than just lefse so are a good investment. I use mine all the time for rolling out cookies and the rare pie or quiche crust. A dough that must be shaped into a rope, like kringla works well on this surface. The lefse rolling pin is a short, large diameter wood pin with narrow grooves encircling the pin. It is covered with a stockinette to keep the flour from collecting in the groove. It is the perfect tool for getting a paper thin finished product. Flat wooden lefse turners are used to transfer the rolled uncooked lefse to the grill and then to turn it over while cooking and to transfer the finished lefse to the stack. A potato ricer is nearly essential for getting a lump free potato mixture. Ruth's recipe is here. Caroline's recipe is here.
Lefse is not the only traditional Norwegian goodie that requires special equipment. We use a special iron to deep fry rosettes and a special cooker to make krumkake. I have previously shared those recipes and they can be found here for the rosettes and here for the krumkake.
Lisa sent me her recipe for kringla and it can be found here. She also sent Grandma Alma's recipe for peppernuts which can be found here.
My mom and dad make donuts. They have a restaurant fryer with a donut attachment. Dad does the frying and mom mixes up the batter. It is a process they have down to a science and their donuts turn out great. The recipe is here.
Monday, December 15, 2014
Tuesday, July 1, 2014
the birthday party
My daughter Nikole turned 30 in May and her guy, Brad, and her sister, Caitlin, hosted a birthday party in her honor. It was a fun party lots of food and drink on their beautiful deck and patio. To say that their was tons of food would be an understatement. Caitlin and Brad arranged for lots of food and then everyone that came brought a dish to share as well. I will share as many recipes as I can collect.
But first a couple of pictures of her birthday flowers.

 Flowers and cupcakes...

 The birthday cupcake...
 Caitlin made the cupcakes, complete with homemade lemon curd and fresh raspberries.
A few pictures of guests...
Nathan and Michelle's other dog, Reese did not make the photos. Nikole and Brad's friends all have dogs and usually when there is a gathering they all come along. Their back yard is fenced and all of the dogs are off leash and all get along. It adds a fun aspect to a party.
Nikole's lilacs from the yard.
 Some of the food...
One of Nikole's favorite appetizer is a pickle, spread with softened cream cheese and wrapped with dried beef and cut into slices. This dip, made by Caitlin has the same combination of flavors but is a dip for crackers. It was very good.
 We made these Sausage Feta Skewers. These were one of the recipes I
trialed for this party at the appetizers only buffet. They are quick
and easy, the sausage that we chose was fully cooked so there was no
cooking necessary. Slicing the cheese and the sausages was the only
prep work and then it was just to put them together on a skewer.
We made these Sausage Feta Skewers. These were one of the recipes I
trialed for this party at the appetizers only buffet. They are quick
and easy, the sausage that we chose was fully cooked so there was no
cooking necessary. Slicing the cheese and the sausages was the only
prep work and then it was just to put them together on a skewer.
 These were skewers of cantaloupe wrapped in prosciutto. It is a common menu item in Italy. There is just something about the combination of flavors that is so good. There is not a separate recipe for these, just two ingredients.
 This was the marinated cheese, another recipe from the appetizer only party earlier in the month. Can be done early in the day. The Italian dressing adds an added dimension to the cheese.

Robb brought Cowboy Caviar. It was made my Traci, Robb's mom and she shared her recipe. It was really good, lots of fresh ingredients.

Colleen and Tom brought a broccoli salad that was very good. I didn't get a picture but I did get the recipe from Colleen after the party.
We made Lisa's sweet corn mac and cheese that had been a hit at the grad party for Kaylee and it went over well here as well.
All but the last photo were taken by Caitlin and shared with me for this post. Thank you Cait.
Links to the recipes are here:
But first a couple of pictures of her birthday flowers.
A few pictures of guests...
 |
| Honey, Nikole and Brad's dog |
 |
| Mars, Brad's parents, Bobbi and Jeff's dog |
 |
| Greta, Nathan and Michelle's foster dog. |
Nikole's lilacs from the yard.
One of Nikole's favorite appetizer is a pickle, spread with softened cream cheese and wrapped with dried beef and cut into slices. This dip, made by Caitlin has the same combination of flavors but is a dip for crackers. It was very good.
Colleen and Tom brought a broccoli salad that was very good. I didn't get a picture but I did get the recipe from Colleen after the party.
We made Lisa's sweet corn mac and cheese that had been a hit at the grad party for Kaylee and it went over well here as well.
All but the last photo were taken by Caitlin and shared with me for this post. Thank you Cait.
Links to the recipes are here:
Thursday, June 12, 2014
the grad party
My sister Lisa has a daughter who graduated from high school this spring so a grad party was in order. In preparing for the upcoming party Lisa wanted the food choices to be Kaylee's favorite foods. They selected a color theme early. Kaylee wanted to have colors other than the school colors so Lisa started amassing a collection of things that she found in the chosen colors of orange and teal. They spent a good part of the winter trialing macaroni and cheese recipes and hamburger recipes and green bean recipes until they found (or perfected) the ones that would be served.
Lisa did some things that were pretty unique and were very successful and I will try to share them here.
Lisa served the food in her garage. In addition to the tables on which the food was served she had two long tables and a pub table for guests to sit at in the garage and had overflow seating on the patio that was in the backyard. For those that might be wondering about serving guests in a garage, it is not that unusual in our Midwestern area and Lisa's garage is not your ordinary garage. She has been hard at work remodeling. She has sheetrocked the walls and installed beadboard topped with a narrow ledge made from layered moldings. The ledge holds her collection of metal signs. She has fun light fixtures and a sophisticated paint color scheme.
Serving in the garage freed up the kitchen for food preparation and provided a place for her kitchen helpers, her two best friends, and assorted family members to refill the trays and provide the freshly cooked food items on her menu. One of her friends, Trudy, was the designated panini maker. Another friend, Judy, baked the batches of beans, assembled the macaroni and cheese ingredients in the crock pots, and made the punches. The rest of us, my girls and I and other helpers that popped in to help, assembled the vegetable shooters, placed the cupcakes in the decorative wrappers and made trips from the kitchen to the garage replenishing serving dishes that were in need of refilling.
The decorations
Lisa and Kaylee chose orange and teal for their color scheme. Lisa picked up orange and teal paper plates and plastic flatware. She chose burlap in varying widths and colors and vases and other containers and silk flowers. She handed the girls a box and the they were able to choose from her collection to decorate the tables. In the last minutechaos excitement that goes along with a party I did not take any photos. I am sharing those taken by others (thank you, Cait).
 White tablecloth, wide burlap runner topped with narrow orange chevron striped runner, blue vase and orange flowers
 White tablecloth, wide burlap runner topped with narrow teal runner and orange candle. Lisa tied orange and teal jute around the salt and pepper shakers that were on the tables. Kaylee's name and graduation year were cut with the cricut from the excess paper used to make the cupcake wrappers and were scattered on the runners.

This was the tail end of the serving table. Orange glazed flower pots hold the flatware. Placing the flatware at the end of the line allows guests to not have to hold on to the flatware while assembling their plate. Another narrow burlap runner in blue and orange is on this serving table. Kaylee's artwork was displayed throughout the room. The colored pencil drawing in the above photo was drawn by Kaylee from a photo of Kaylee with her camera taken by a friend. The photo was inspiration for this self-portrait. The square teal plates in the photo above and below hold coated Oreo cookies. Lisa purchased molds made for this purpose. The mold holds a layer of the melted almond bark coating, the cookie is placed in the mold and more coating is placed on top. Once the coating sets the cookies are popped out of the mold.
.JPG)
 Here is another angle of this serving table. One of Lisa's teal serving trays holds the cupcakes with their paper wrappers and orange and blue decorated tops. Kaylee wanted cupcakes instead of a decorated sheet cake and Lisa served a combination of purchased cupcakes and those that she baked and decorated. These were the purchased cupcakes.
 These were the some of the cupcakes that Lisa baked and decorated, topped with miniature candies and nuts on their frosting. I shared a picture of Manny watching the cricut in action as I made the cupcake wrappers here.
The serving table
Lisa used a buffet server that belongs to our mother. It plugs in and has three covered pans that keep food warm. My mom purchased two of them several years ago and we used the pans from the second one to swap out with the first ones and it worked great. Refilling the empty pans was as easy as removing one and replacing it with another. It was quick and provided little interruption for the people line filling their plates. She served the beans and the panini sandwiches from the buffet server. She also used crock pots for the macaroni and cheese, the soup, and the sliders.
She served relishes in disposable shot glasses that were purchased at the same party place as the paper plates and flatware.
 She served the fruit salad in clear drink cups. Having these two food items already dished into individual servings made it simple for guests to grab a cup and go. Trays held the cups and were easily refilled or swapped out. Having a limited supply on the table meant we did not have to find a way to keep these dishes chilled over the course of the open house. New cups were filled with chilled ingredients from her refrigerator as needed.
Lisa had a small chalkboard menu at the beginning of her serving table. It gave guests a list of what foods they would find as they moved through the line.

Near each item on the serving table was a small chalkboard easel identifying each item.
 We were able to purchase a chalk marker in a bright orange to match her color theme.
The food
Lisa served foods that were Kaylee's favorites. The hot foods included a wonderful macaroni and cheese that contained both whole kernel and cream style corn. She roasted fresh green beans in a Tuscan basil infused olive oil and topped them with freshly grated Parmesan cheese which were delicious. She served terrific small grilled cheese sandwiches that were made on the panini press and served with a San Marzano tomato sauce for dipping. The other sandwich, also very tasty, was a small hamburger slider, nicknamed hambies, in the same San Marzano sauce. I contributed a crock pot of a savory butternut squash soup which was served with croutons. The cold foods were a mixed fruit salad in strawberry yogurt and the veggie shooters. The sweets were the cupcakes and the Oreo cookies.
Beverages included coffee and three punches. Lisa has three glass dispensers with spigots that she used for her punches and each held a different punch. The dispensers could be carried to the kitchen for refilling leaving the other two in place so there was always at least two choices available for guests with no waiting and the guest served themselves so there was no need for someone tasked with filling the punch cups as guests moved through the line. Our party store sells small children's toys to fill gift bags and while moving through that aisle we noticed two sized of mini frisbees in her exact orange color. We purchased several of both sizes and the larger ones when placed upside down near each food item were used as spoon rests to hold the serving spoon. The smaller ones were used in a similar fashion to catch drips under the beverage spigots.
A funny story about the punch
Lisa had three different punch recipes planned and all of the ingredients were stacked together. At the time of the start of the party the actual recipes were not with the ingredients. Lisa's friend, Judy, mixed and matched the assembled ingredients in various combinations. Each batch was different. All were good but there are no recipes to share.
A funny story about the green beans
Mom and Dad helped with prepping the fruit, relishes and green beans. Life goes on even though you have a grad party to pull together. I know that at least some of the beans were prepped while sitting in their vehicle at a baseball game watching Kaylee's brother, Chase, play baseball.
The menu
Clicking on each item will take you to the recipe.
Lisa did some things that were pretty unique and were very successful and I will try to share them here.
Lisa served the food in her garage. In addition to the tables on which the food was served she had two long tables and a pub table for guests to sit at in the garage and had overflow seating on the patio that was in the backyard. For those that might be wondering about serving guests in a garage, it is not that unusual in our Midwestern area and Lisa's garage is not your ordinary garage. She has been hard at work remodeling. She has sheetrocked the walls and installed beadboard topped with a narrow ledge made from layered moldings. The ledge holds her collection of metal signs. She has fun light fixtures and a sophisticated paint color scheme.
Serving in the garage freed up the kitchen for food preparation and provided a place for her kitchen helpers, her two best friends, and assorted family members to refill the trays and provide the freshly cooked food items on her menu. One of her friends, Trudy, was the designated panini maker. Another friend, Judy, baked the batches of beans, assembled the macaroni and cheese ingredients in the crock pots, and made the punches. The rest of us, my girls and I and other helpers that popped in to help, assembled the vegetable shooters, placed the cupcakes in the decorative wrappers and made trips from the kitchen to the garage replenishing serving dishes that were in need of refilling.
The decorations
Lisa and Kaylee chose orange and teal for their color scheme. Lisa picked up orange and teal paper plates and plastic flatware. She chose burlap in varying widths and colors and vases and other containers and silk flowers. She handed the girls a box and the they were able to choose from her collection to decorate the tables. In the last minute
This was the tail end of the serving table. Orange glazed flower pots hold the flatware. Placing the flatware at the end of the line allows guests to not have to hold on to the flatware while assembling their plate. Another narrow burlap runner in blue and orange is on this serving table. Kaylee's artwork was displayed throughout the room. The colored pencil drawing in the above photo was drawn by Kaylee from a photo of Kaylee with her camera taken by a friend. The photo was inspiration for this self-portrait. The square teal plates in the photo above and below hold coated Oreo cookies. Lisa purchased molds made for this purpose. The mold holds a layer of the melted almond bark coating, the cookie is placed in the mold and more coating is placed on top. Once the coating sets the cookies are popped out of the mold.
The serving table
Lisa used a buffet server that belongs to our mother. It plugs in and has three covered pans that keep food warm. My mom purchased two of them several years ago and we used the pans from the second one to swap out with the first ones and it worked great. Refilling the empty pans was as easy as removing one and replacing it with another. It was quick and provided little interruption for the people line filling their plates. She served the beans and the panini sandwiches from the buffet server. She also used crock pots for the macaroni and cheese, the soup, and the sliders.
She served relishes in disposable shot glasses that were purchased at the same party place as the paper plates and flatware.
Lisa had a small chalkboard menu at the beginning of her serving table. It gave guests a list of what foods they would find as they moved through the line.
Near each item on the serving table was a small chalkboard easel identifying each item.
The food
Lisa served foods that were Kaylee's favorites. The hot foods included a wonderful macaroni and cheese that contained both whole kernel and cream style corn. She roasted fresh green beans in a Tuscan basil infused olive oil and topped them with freshly grated Parmesan cheese which were delicious. She served terrific small grilled cheese sandwiches that were made on the panini press and served with a San Marzano tomato sauce for dipping. The other sandwich, also very tasty, was a small hamburger slider, nicknamed hambies, in the same San Marzano sauce. I contributed a crock pot of a savory butternut squash soup which was served with croutons. The cold foods were a mixed fruit salad in strawberry yogurt and the veggie shooters. The sweets were the cupcakes and the Oreo cookies.
Beverages included coffee and three punches. Lisa has three glass dispensers with spigots that she used for her punches and each held a different punch. The dispensers could be carried to the kitchen for refilling leaving the other two in place so there was always at least two choices available for guests with no waiting and the guest served themselves so there was no need for someone tasked with filling the punch cups as guests moved through the line. Our party store sells small children's toys to fill gift bags and while moving through that aisle we noticed two sized of mini frisbees in her exact orange color. We purchased several of both sizes and the larger ones when placed upside down near each food item were used as spoon rests to hold the serving spoon. The smaller ones were used in a similar fashion to catch drips under the beverage spigots.
A funny story about the punch
Lisa had three different punch recipes planned and all of the ingredients were stacked together. At the time of the start of the party the actual recipes were not with the ingredients. Lisa's friend, Judy, mixed and matched the assembled ingredients in various combinations. Each batch was different. All were good but there are no recipes to share.
A funny story about the green beans
Mom and Dad helped with prepping the fruit, relishes and green beans. Life goes on even though you have a grad party to pull together. I know that at least some of the beans were prepped while sitting in their vehicle at a baseball game watching Kaylee's brother, Chase, play baseball.
The menu
Clicking on each item will take you to the recipe.
Menu
Monday, June 2, 2014
appetizers only buffet
I belong to an organization that meets monthly and we take turns bringing the lunch. It is a small group, usually around 10 of us or so each month and this time when it was my turn to serve I decided to do an appetizers only buffet. It is really up to the hostess to decide what she is going to bring. Last time it was my turn I brought a casserole and salad. This time I knew that there was another event upcoming so it was a perfect opportunity to try a few trial a couple of new recipes. Here is my menu.
1/2 cup balsamic vinegar
1/2 cup honey
1/2 cup brown sugar
1/4 cup soy sauce
2 sprigs rosemary
5 cloves of garlic, halved
10-12 chicken drummies or wing sections
1 Tbsp cornstarch
2 Tbsp sesame seeds, optional
1 green onion, sliced
Combine the balsamic vinegar, honey, brown sugar and soy sauce stirring until the honey and brown sugar are dissolved. Place the mixture in a resealable plastic bag and add the rosemary and garlic cloves. Add the chicken pieces and seal the bag, trying to remove as much air as possible. Marinade in the refrigerator for two hours. Preheat oven to 450°. Remove the chicken from the marinade and place on a greased and foil lined baking sheet. Reserve the marinade. Bake the chicken pieces for 30-35 minutes or until the skin is slightly crispy.
While the chicken is baking place the marinade in a saucepan and bring to a boil. Reduce the heat to medium low and simmer for 15 minutes. Add cornstarch 1 tsp at a time until sauce reaches desired thickness. Remove chicken from the oven and brush on the sauce. Sprinkle with sesame seeds and onion slices.
Sausage Feta Skewers
Chorizo sausage ( I used Guy Fieri Italian Sausage)
Goat cheese or Feta cheese
Olive
parsley
The sausage that I used was fully cooked, so I sliced it and served it cold. I cut the Feta cheese into similarly sized pieces. I selected a larger sized pimento stuffed olive. I assembled the appetizer by piercing thru the olive with the skewer, then thru the cheese slice and then into the sausage slice. I did not have fresh parsley so I omitted it and they were very good without it. With fully cooked sausages these do not require any cooking. They can be assembled quickly and are very tasty.

Marinated Cheeses with Crackers
1 Good Seasons Italian Dressing packet
1/2 cup vegetable oil
1/4 cup white vinegar
2 Tbsp minced green onion
2 Tbsp water
1 1/2 tsp sugar
8 oz block of Monterey Jack cheese, chilled
8 oz block of cheddar cheese, chilled
8 oz block of cream cheese, chilled
4 oz jar of chopped pimento, drained
Assorted crackers
Whisk together the first six ingredients and set aside. Cut the cheeses in half lengthwise and then cut each half into 1/4 inch thick slices. Arrange in rows alternating the three cheeses and standing on edges in a shallow baking dish. Pour marinade mixture over cheeses, cover and refrigerate at least 8 hours. To serve either drain marinade and arrange cheese on platter and top with pimento or serve right from the container with the marinade. I did not have pimento and it tasted really good without it but the picture accompanying the original recipe was much more colorful with it. I used wheat thins, the original version and it was a nice flavor combination with the cheese and marinade.

Reuben Appetizers
36 cocktail rye bread (we used a loaf of marble rye with slices cut in quarters)
4 oz package sliced corn beef (we used sliced deli pastrami)
8 oz can sauerkraut, drained and snipped into short pieces
6 slices Swiss cheese, (we used grated)
thousand island salad dressing
We spread each slice of bread with thousand island dressing, added a slice of pastrami and topped it with a tsp or so of the sauerkraut and some cheese. Place the open faced appetizer on a parchment lined baking sheet and bake at 400° for 6-8 minutes or until cheese melts and they are heated through.

Bacon and Cheese Wrapped Tater Tots with Tabasco
24 tater tots
12 slices bacon, cut in half crosswise
24 small chunks of sharp cheddar cheese about 1/2 inch x 1/4 inch
Tabasco sauce
Preheat oven to 450. Line baking sheet with parchment paper. Take a partially defrosted tater tot and place it on a bacon strip half. Make a slit in the tot and tuck a small piece of cheese in the slit. Sprinkle with Tabasco sauce. Roll the bacon around the tot/cheese and secure with toothpick if needed. Place on prepared baking sheet. Bake 15 minutes or until they appear to be cooked through and the bacon is crispy. The original recipe includes a couple fun looking variations and a spicy dipping sauce option.
This menu had some drawbacks. The place where our meeting was held does not make for easy baking so I was trying to bring hot food from home. I also used my mom's buffet server but it took a while to get it up to temperature. Doing these recipes where they could be baked and served right away would work much better. If you were to do these recipes I would follow these steps:
Sources:
Honey Balsamic Drummies
Sausage Feta Skewers
Marinaded cheese
Bacon and Cheese wrapped tator tots
The Reuben appetizer is a shared recipe and origin is unknown
Menu
Honey Balsamic Drummies
Sausage Feta Skewers
Marinated Cheeses with crackers
Reuben Appetizers
Bacon and Cheese Wrapped Tater Tots with Tabasco
Honey Balsamic Drummies
1/2 cup balsamic vinegar
1/2 cup honey
1/2 cup brown sugar
1/4 cup soy sauce
2 sprigs rosemary
5 cloves of garlic, halved
10-12 chicken drummies or wing sections
1 Tbsp cornstarch
2 Tbsp sesame seeds, optional
1 green onion, sliced
Combine the balsamic vinegar, honey, brown sugar and soy sauce stirring until the honey and brown sugar are dissolved. Place the mixture in a resealable plastic bag and add the rosemary and garlic cloves. Add the chicken pieces and seal the bag, trying to remove as much air as possible. Marinade in the refrigerator for two hours. Preheat oven to 450°. Remove the chicken from the marinade and place on a greased and foil lined baking sheet. Reserve the marinade. Bake the chicken pieces for 30-35 minutes or until the skin is slightly crispy.
While the chicken is baking place the marinade in a saucepan and bring to a boil. Reduce the heat to medium low and simmer for 15 minutes. Add cornstarch 1 tsp at a time until sauce reaches desired thickness. Remove chicken from the oven and brush on the sauce. Sprinkle with sesame seeds and onion slices.
Sausage Feta Skewers
Chorizo sausage ( I used Guy Fieri Italian Sausage)
Goat cheese or Feta cheese
Olive
parsley
The sausage that I used was fully cooked, so I sliced it and served it cold. I cut the Feta cheese into similarly sized pieces. I selected a larger sized pimento stuffed olive. I assembled the appetizer by piercing thru the olive with the skewer, then thru the cheese slice and then into the sausage slice. I did not have fresh parsley so I omitted it and they were very good without it. With fully cooked sausages these do not require any cooking. They can be assembled quickly and are very tasty.
Marinated Cheeses with Crackers
1 Good Seasons Italian Dressing packet
1/2 cup vegetable oil
1/4 cup white vinegar
2 Tbsp minced green onion
2 Tbsp water
1 1/2 tsp sugar
8 oz block of Monterey Jack cheese, chilled
8 oz block of cheddar cheese, chilled
8 oz block of cream cheese, chilled
4 oz jar of chopped pimento, drained
Assorted crackers
Whisk together the first six ingredients and set aside. Cut the cheeses in half lengthwise and then cut each half into 1/4 inch thick slices. Arrange in rows alternating the three cheeses and standing on edges in a shallow baking dish. Pour marinade mixture over cheeses, cover and refrigerate at least 8 hours. To serve either drain marinade and arrange cheese on platter and top with pimento or serve right from the container with the marinade. I did not have pimento and it tasted really good without it but the picture accompanying the original recipe was much more colorful with it. I used wheat thins, the original version and it was a nice flavor combination with the cheese and marinade.
Reuben Appetizers
36 cocktail rye bread (we used a loaf of marble rye with slices cut in quarters)
4 oz package sliced corn beef (we used sliced deli pastrami)
8 oz can sauerkraut, drained and snipped into short pieces
6 slices Swiss cheese, (we used grated)
thousand island salad dressing
We spread each slice of bread with thousand island dressing, added a slice of pastrami and topped it with a tsp or so of the sauerkraut and some cheese. Place the open faced appetizer on a parchment lined baking sheet and bake at 400° for 6-8 minutes or until cheese melts and they are heated through.
Bacon and Cheese Wrapped Tater Tots with Tabasco
24 tater tots
12 slices bacon, cut in half crosswise
24 small chunks of sharp cheddar cheese about 1/2 inch x 1/4 inch
Tabasco sauce
Preheat oven to 450. Line baking sheet with parchment paper. Take a partially defrosted tater tot and place it on a bacon strip half. Make a slit in the tot and tuck a small piece of cheese in the slit. Sprinkle with Tabasco sauce. Roll the bacon around the tot/cheese and secure with toothpick if needed. Place on prepared baking sheet. Bake 15 minutes or until they appear to be cooked through and the bacon is crispy. The original recipe includes a couple fun looking variations and a spicy dipping sauce option.
 |
| next time I would use shorter pieces of cheese |
 |
| ready for the oven |
This menu had some drawbacks. The place where our meeting was held does not make for easy baking so I was trying to bring hot food from home. I also used my mom's buffet server but it took a while to get it up to temperature. Doing these recipes where they could be baked and served right away would work much better. If you were to do these recipes I would follow these steps:
- Make the marinade for the cheese, prep the cheese slices and get the marinade on the cheese and in the refrigerator early in the day.
- Make the marinade for the drummies and get that in the refrigerator several hours ahead
- slice the sausage and cheese for the skewers
- assemble the Reubens, wait to bake
- assemble the tater tots, wait to bake
- assemble the skewers
- begin heating the buffet server
- bake the drummies, transfer to buffet server, top with sauce, sesame seeds and onions
- bake the tater tots, transfer to buffet server
- bake the Reubens, transfer to buffet server
- while baking the above, arrange the cheese slices and top with pimento and arrange the crackers.
Sources:
Honey Balsamic Drummies
Sausage Feta Skewers
Marinaded cheese
Bacon and Cheese wrapped tator tots
The Reuben appetizer is a shared recipe and origin is unknown
Wednesday, April 2, 2014
cabbage salad
The February cookbook is a book called Aggieville Appetites. The cookbook review can be found here. The March recipe from from the Aggieville cookbook is a cabbage salad. It is sliced cabbage, red onion and green pepper layered with sugar and with a cooked dressing poured over. The dressing is oil and vinegar with sugar, salt, celery seeds and dry mustard. It is purported to keep for three weeks in the refrigerator. It makes a large salad.

Cabbage Salad
1 large head cabbage, thinly sliced
1 red onion, thinly sliced
1 green pepper, thinly sliced
1 cup sugar
layer the vegetables and sugar using 1/4 of the cabbage, onion and green pepper with 1/4 cup sugar for each layer.
Dressing
2 Tbsp sugar
1 tsp dry mustard
1 tsp celery seed
1 tsp salt
1 cup vinegar
3/4 cup canola oil
Combine dressing ingredients in a saucepan and bring to a boil. Allow to cool slightly and then pour over vegetable layers. Stir occasionally. Keeps three weeks if refrigerated.
When I made this recipe I used white vinegar. I am wondering how it would be with a cider vinegar or a seasoned rice vinegar. I enjoyed the salad. There was just a little hotness to it, which I assumed came from the red onion. It will be interesting to see if over the course of its life in my refrigerator that onion flavor intensifies or mellows. Perhaps it will get more pickled. If it intensifies I might consider using a sweet onion or cooking it a bit. A possible alternative, if using a white onion instead of red, might be to add a little shredded carrot to replace the missing color.
Sunday, March 2, 2014
March 2014 cookbook review
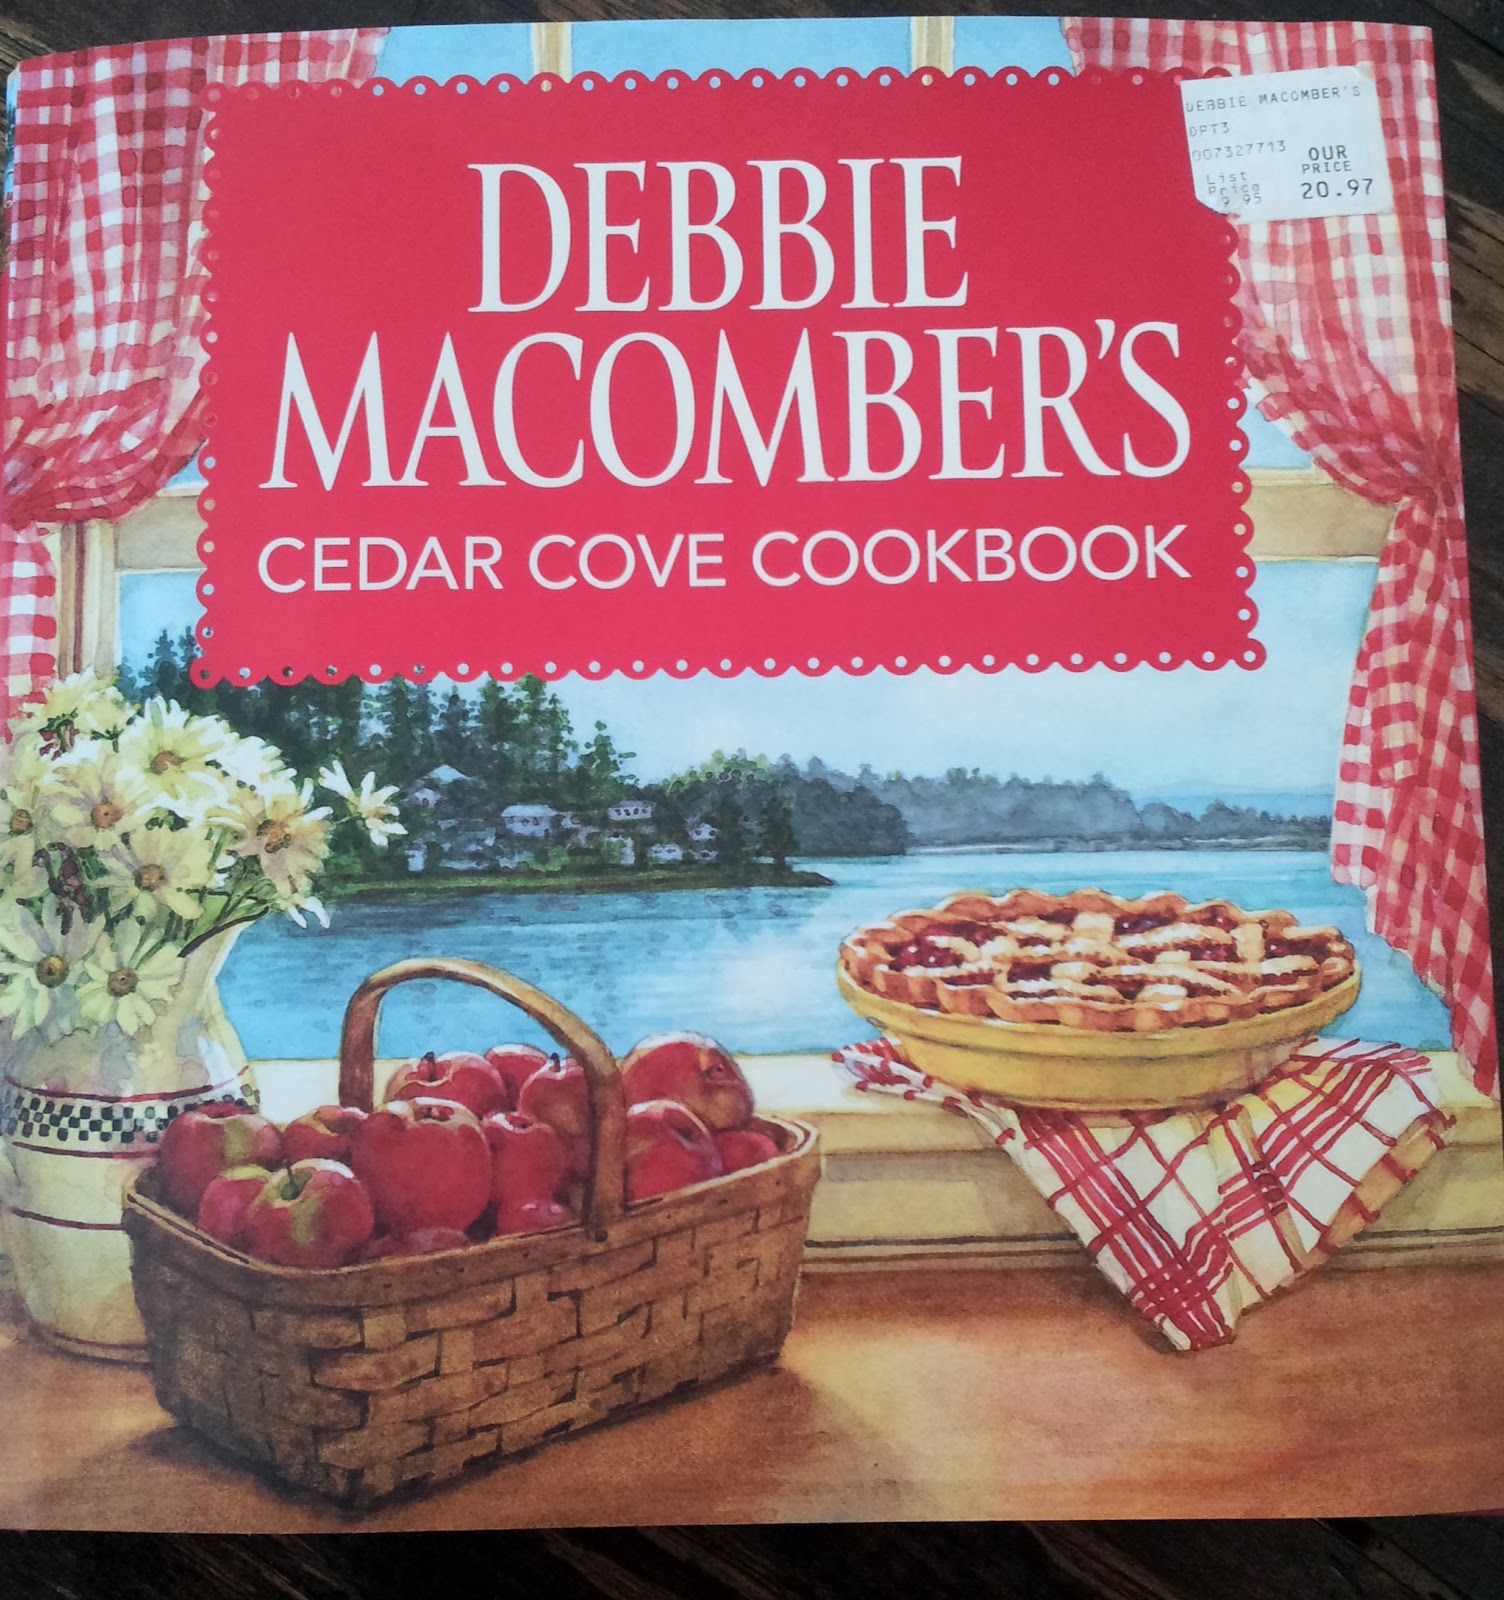
The cookbook that I reviewed for January was a specialty cookbook, with recipes for different types of candy. The cookbook for February was a cookbook in the style of a 'church cookbook' and contains lots of different types of recipes. The contributors were business owners in an area called Aggieville near the campus of Kansas State University. The cookbook chosen for March is a book called Debbbie Macomber's Cedar Cove Cookbook.
Debbie Macomber is an author of romance novels and the Cedar Cove series is a group of her stories set in the fictional town of Cedar Cove. In the series is a group of characters that have recurring roles in many of the stories. One of the characters takes the reader of the cookbook on a tour of some of the kitchens in Cedar Cove with a few recipes from each location. It is a different presentation for a cookbook and along the way the main character shares little tidbits about the other characters in the series.
The book is attractively put together. Where the Aggieville cookbook had photos of Aggieville but no photos of food this cookbook has is full of colorful drawings and photos of the recipes. Each recipe page has a border on it and each new chapter has a new pattern and color to the border. Each chapter is about a different eatery or hostess from the town.There are lots of illustrations of kitchen or food items and each chapter has several full page photos of a prepared recipe from the chapter. The last four chapters are a chapter on Easter, Independence Day, Thanksgiving and Christmas with a group of recipes suitable for holiday meals.
Sunday, February 2, 2014
February 2014 cookbook review
I have a large variety of cookbooks. I collect all kinds. I have a few by famous chefs, a few by celebrity chefs, a few that are more off beat, some serious, some educational, some new, some 'antique', some with sentimental value because they belonged to my grandmother, some themed cookbooks.
The cookbook that I am reviewing today is a cookbook that around here is known as a 'church cookbook'. I have quite a few of this type of cookbook. They are all pretty similar in that they almost always have a paperback cover and a spiral type binding holding the pages together. They rarely have pictures of any of the foods, no glossy pages with foods artfully arranged by food stylists. These cookbooks are always a collection of recipes contributed by a group. The group might be the ladies of a congregation, hence the nickname 'church cookbook'. But they could also be some other group. I have cookbooks published by an elementary school and a nursing home. Sometimes they are a group raising funds for a cause. I have a cookbook published by a Relay For Life chapter and an Eastern Star chapter and I recently contributed some of my recipes to a cookbook being put together to benefit ALS. And sometimes they promote a region. My mom knows that I love cookbooks and between us we have purchased three copies of the Wall Drug cookbook. One more trip to Rapid City South Dakota and I will have enough copies for myself and each of my children.
The cookbook that I am reviewing today is one of those regional cookbooks. My younger daughter spent her college years at Kansas State. Go Cats! And adjacent to the campus is a six square block business district known as Aggieville. It is the oldest shopping district in Kansas. It is a great collection of bars, restaurants and shops. Before K State was the Wildcats it was the Aggies and the name stuck. You can read about Aggieville on Wikipedia and a quick Google search finds 82,000+ hits. While on one of our visits to campus I purchased a cookbook published with recipes contributed by the merchants of Aggieville.

Aggieville Appetites has on its cover a photo of Varneys bookstore in Aggieville. The cover is edged in Wildcat purple and it has 250 pages of recipes. There is a nice recipe index at the back of the book and the dividers between the chapter contain black and white photos of Aggieville.
I have perused the cookbook and have a list of great looking recipes to try. I look forward to sharing them over the next year.
The cookbook that I am reviewing today is a cookbook that around here is known as a 'church cookbook'. I have quite a few of this type of cookbook. They are all pretty similar in that they almost always have a paperback cover and a spiral type binding holding the pages together. They rarely have pictures of any of the foods, no glossy pages with foods artfully arranged by food stylists. These cookbooks are always a collection of recipes contributed by a group. The group might be the ladies of a congregation, hence the nickname 'church cookbook'. But they could also be some other group. I have cookbooks published by an elementary school and a nursing home. Sometimes they are a group raising funds for a cause. I have a cookbook published by a Relay For Life chapter and an Eastern Star chapter and I recently contributed some of my recipes to a cookbook being put together to benefit ALS. And sometimes they promote a region. My mom knows that I love cookbooks and between us we have purchased three copies of the Wall Drug cookbook. One more trip to Rapid City South Dakota and I will have enough copies for myself and each of my children.
The cookbook that I am reviewing today is one of those regional cookbooks. My younger daughter spent her college years at Kansas State. Go Cats! And adjacent to the campus is a six square block business district known as Aggieville. It is the oldest shopping district in Kansas. It is a great collection of bars, restaurants and shops. Before K State was the Wildcats it was the Aggies and the name stuck. You can read about Aggieville on Wikipedia and a quick Google search finds 82,000+ hits. While on one of our visits to campus I purchased a cookbook published with recipes contributed by the merchants of Aggieville.
Aggieville Appetites has on its cover a photo of Varneys bookstore in Aggieville. The cover is edged in Wildcat purple and it has 250 pages of recipes. There is a nice recipe index at the back of the book and the dividers between the chapter contain black and white photos of Aggieville.
I have perused the cookbook and have a list of great looking recipes to try. I look forward to sharing them over the next year.
Saturday, February 1, 2014
English toffee
The January cookbook is called truffles, candies & confections. You can see the review of the cookbook here. The recipe for February is an English toffee. Caitlin was home this weekend so we made a batch. Neither of us have made toffee before and we think that it turned out pretty good. It is a cooked candy center dipped in chocolate and then almonds are added before the chocolate sets so that the nuts stick to the chocolate.
Making toffee calls for a few special tools, most of which I already had but one, a metal rolling pin, is one I will probably be on the lookout for. I have a collection of rolling pins, some new, some antique; most are wood, but also a glass one and a marble one.
This recipe calls for rolling the hot candy with an oiled rolling pin. I considered the glass but elected to use the marble. When I got to that part of the recipe I found that the hot candy hardened on the cold marble pin. It still worked but there was a heightened need to work quickly before the candy cooled too much.
Some of my rolling pins:
Some of the other tools needed are a marble board and a candy thermometer. The candy is cooked on the stove and a saucepan with a heavy base is also handy and you will need a wooden spoon or a heatproof silicone spatula.
You start out by melting the butter in a saucepan and once melted you add water, sugar and salt.
 When it reaches 260° you add part of the nuts and continue cooking until it reaches 300°. Then it is quickly poured onto the marble board that has had a thin coating of oil applied. Ours barely fit on the board. We quickly rolled it out and scored it with an oiled pizza cutter. I am afraid that even with both of us working as quickly as we could we did not get any pictures of that part. As it was, by the time that Caitlin was making the final score marks it was just about too cool.
One the candy cools, it breaks apart without too much effort (mostly) on the score marks. We had a few pieces that broke in the center and made odd shaped pieces. At this point the cookbook states that the candy needs to be coated in chocolate or covered in airtight packaging for if it is left exposed it will absorb moisture from the air and become soft.
We dipped our centers in melted chocolate. We used a chocolate melter and a dipping fork but a microwave and a dinner fork would work also.
We broke apart our centers on their score lines when cool. We set up a tray with our centers on the far right. Next to that on the left side was the chocolate melter. To the left of that was a cake pan with a sheet of parchment paper and the chopped sliced almonds. And on the far left was a couple of empty cookie sheets that were lined with parchment.
A candy center was lowered into the chocolate, turned to coat all sides and then lifted out with the dipping fork. Held suspended over the chocolate reservoir briefly allowed the excess chocolate to drop back into the pot. Then the coated center was placed on the layer of chopped nuts in the cake pan and tipped over to coat all sides. The cookbook instructed to coat all sides with nuts and then chill to harden the chocolate. We did the first dozen or so this way and then became a little concerned that we did not have enough nuts to finish all of the centers. So we finished the rest by coating all sides with the chocolate but only sprinkling nuts on the top of the candy.
English Toffee
3 Tbsp unflavored vegetable oil such as safflower oil (for oiling board, pin and cutter)
1 1/4 cup unsalted butter (2 1/2 sticks)
1 cup sugar
1/4 cup water
1/2 tsp salt
2 1/2 cups sliced almonds, finely chopped (divided)
12 ounces bittersweet chocolate, finely chopped (We used a bag of dark chocolate chips)
Prepare marble board, rolling pin and pizza cutter by coating with a thin layer of vegetable oil and set aside. Melt the butter in heavy 3 quart saucepan over low heat. Add the sugar, water and salt. Turn the heat up to medium and cook, stirring constantly, until temperature reaches 260°on the candy thermometer. Stir in 1/2 cup of the finely chopped almonds and continued cooking, stirring constantly until the thermometer measures 300° and the mixture is golden brown which should take about 8 minutes. We noticed that the mixture started out as a pale bubbly thin liquid and as it cooked it became thicker and went thru a couple of changes. For a while it kind of resembled cream style corn in appearance. A little later there seemed to be a layer of what looked like melted butter collecting on the surface of the thicker mixture and then finally it looked like thick gravy. Eventually it got to the right temperature and was a golden colored thick syrup that we carefully poured onto the oiled board. At this point we used the oiled rolling pin to spread the hot syrup into as thin a layer as we could manage. Our layer was about 1/4 inch thick in places, thinner toward one edge. Caitlin quickly grabbed the oiled pizza cutter and began to score the hot syrup in both directions first making rows about 1/2 inch wide and then cutting the rows crosswise into 2 inch pieces. The scored candy was allowed to cool about 30 minutes. When it was pretty cool we were able to break the candy along the scored lines into pieces. What worked for us is to slide the whole piece of hardened candy off the oiled board until the first score line matched the edge of the board and then press down to snap the candy on the edge of the board where the score mark was. Then turn the snapped off piece and break along the crosswise score marks. Once all of the pieces are separated we put them on a parchment lined cookie sheet. They were placed one piece at a time into the melted chocolate. The recipe calls for bittersweet chocolate that has been finely chopped and tempered. We used a bag of Hershey's Special Dark chocolate chips, melted. We did not temper it and since it was already in chip form it did not need to be chopped. It worked great. Once placed in the chocolate the toffees were turned over to coat all sides and then lifted out with the fork and suspended over the bowl to let the excess chocolate drain back into the bowl. Then the coated piece was placed on the rest of the chopped slivered almonds that were on a piece of parchment lying in a cake pan or cookie sheet. The first few pieces we coated on all sides by rolling them in the chopped nuts but them we coated only to top of some of the toffees by sprinkling nuts on the top of the candy. We then placed them on a parchment lined pan until they set. Once we had a pan full we chilled it to hasten the setting of the chocolate.

These turned out great and I will definitely make these again. They would make a good gift and would be great on a holiday goodie platter with cookies and other candies.
Shared on Foodie Friday
Making toffee calls for a few special tools, most of which I already had but one, a metal rolling pin, is one I will probably be on the lookout for. I have a collection of rolling pins, some new, some antique; most are wood, but also a glass one and a marble one.
This recipe calls for rolling the hot candy with an oiled rolling pin. I considered the glass but elected to use the marble. When I got to that part of the recipe I found that the hot candy hardened on the cold marble pin. It still worked but there was a heightened need to work quickly before the candy cooled too much.
Some of my rolling pins:
 |
| the marble one is in the back of the crock |
Some of the other tools needed are a marble board and a candy thermometer. The candy is cooked on the stove and a saucepan with a heavy base is also handy and you will need a wooden spoon or a heatproof silicone spatula.
 |
| marble board and rolling pin |
 | |
| I have this style of thermometer but the glass one would work too |
 |
| the scored cooling candy centers |
We dipped our centers in melted chocolate. We used a chocolate melter and a dipping fork but a microwave and a dinner fork would work also.
We broke apart our centers on their score lines when cool. We set up a tray with our centers on the far right. Next to that on the left side was the chocolate melter. To the left of that was a cake pan with a sheet of parchment paper and the chopped sliced almonds. And on the far left was a couple of empty cookie sheets that were lined with parchment.
A candy center was lowered into the chocolate, turned to coat all sides and then lifted out with the dipping fork. Held suspended over the chocolate reservoir briefly allowed the excess chocolate to drop back into the pot. Then the coated center was placed on the layer of chopped nuts in the cake pan and tipped over to coat all sides. The cookbook instructed to coat all sides with nuts and then chill to harden the chocolate. We did the first dozen or so this way and then became a little concerned that we did not have enough nuts to finish all of the centers. So we finished the rest by coating all sides with the chocolate but only sprinkling nuts on the top of the candy.
 |
| candy center suspended over pot |
 |
| candy with nuts on the top |
 |
| cookie sheet with drying toffees |
 |
| here you can see the center, coating and nuts |
3 Tbsp unflavored vegetable oil such as safflower oil (for oiling board, pin and cutter)
1 1/4 cup unsalted butter (2 1/2 sticks)
1 cup sugar
1/4 cup water
1/2 tsp salt
2 1/2 cups sliced almonds, finely chopped (divided)
12 ounces bittersweet chocolate, finely chopped (We used a bag of dark chocolate chips)
Prepare marble board, rolling pin and pizza cutter by coating with a thin layer of vegetable oil and set aside. Melt the butter in heavy 3 quart saucepan over low heat. Add the sugar, water and salt. Turn the heat up to medium and cook, stirring constantly, until temperature reaches 260°on the candy thermometer. Stir in 1/2 cup of the finely chopped almonds and continued cooking, stirring constantly until the thermometer measures 300° and the mixture is golden brown which should take about 8 minutes. We noticed that the mixture started out as a pale bubbly thin liquid and as it cooked it became thicker and went thru a couple of changes. For a while it kind of resembled cream style corn in appearance. A little later there seemed to be a layer of what looked like melted butter collecting on the surface of the thicker mixture and then finally it looked like thick gravy. Eventually it got to the right temperature and was a golden colored thick syrup that we carefully poured onto the oiled board. At this point we used the oiled rolling pin to spread the hot syrup into as thin a layer as we could manage. Our layer was about 1/4 inch thick in places, thinner toward one edge. Caitlin quickly grabbed the oiled pizza cutter and began to score the hot syrup in both directions first making rows about 1/2 inch wide and then cutting the rows crosswise into 2 inch pieces. The scored candy was allowed to cool about 30 minutes. When it was pretty cool we were able to break the candy along the scored lines into pieces. What worked for us is to slide the whole piece of hardened candy off the oiled board until the first score line matched the edge of the board and then press down to snap the candy on the edge of the board where the score mark was. Then turn the snapped off piece and break along the crosswise score marks. Once all of the pieces are separated we put them on a parchment lined cookie sheet. They were placed one piece at a time into the melted chocolate. The recipe calls for bittersweet chocolate that has been finely chopped and tempered. We used a bag of Hershey's Special Dark chocolate chips, melted. We did not temper it and since it was already in chip form it did not need to be chopped. It worked great. Once placed in the chocolate the toffees were turned over to coat all sides and then lifted out with the fork and suspended over the bowl to let the excess chocolate drain back into the bowl. Then the coated piece was placed on the rest of the chopped slivered almonds that were on a piece of parchment lying in a cake pan or cookie sheet. The first few pieces we coated on all sides by rolling them in the chopped nuts but them we coated only to top of some of the toffees by sprinkling nuts on the top of the candy. We then placed them on a parchment lined pan until they set. Once we had a pan full we chilled it to hasten the setting of the chocolate.
These turned out great and I will definitely make these again. They would make a good gift and would be great on a holiday goodie platter with cookies and other candies.
Shared on Foodie Friday
Subscribe to:
Posts (Atom)